Recalculating
20” x 45”
Project Difficulty: Easy
Sewist Level – Confident Beginner
I designed this tablerunner in 2016 as part of a blog hop. Shown here in Christmas colors, it would also be lovely made as a scrappy or modern quilt, or one block could be used as a pillow. This is an easy project to make, great for confident beginners. This method of making a flying geese unit is easily adaptable to a variety of sizes of skies. In this project, your single flying geese block is 2 ½” tall and 12 ½” wide.
Fabric Requirements:
You will need the following fabrics. I always prewash my fabrics before beginning a project.
Flying Goose blocks – One fat quarter of each of Fabric A, B and C. A fat quarter measures 18” x 21”.
Inner Border (Shown in Red) – 1/3 yard
Outer Border (Shown I Green) – 1/3 yard
Batting – 22” x 47” (you can piece scraps together for this project)
Backing – 22” x 47”
Binding – at least 145 inches (see pattern notes below).
Cut Fabric A and Fabric B fat quarters (the sky fabric) into units 2 ½” wide x 6 ½” long. Cut Fabric C fat quarter (the geese) into units 2 ½” wide x 4 ½” long. Each geese block will need one A unit, one B unit and one C unit.
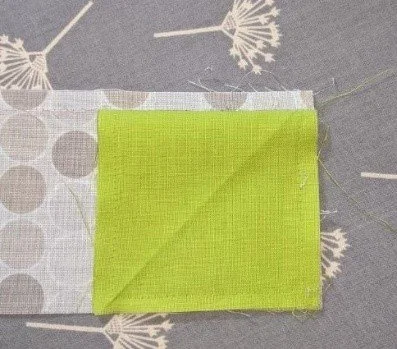
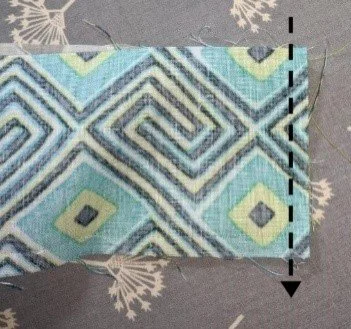
To construct a flying geese block, place the A unit and the B unit next to one another with the 2 ½” sides adjoining, right sides up. Fold the C unit in half the long way, with the wrong sides together and the folded edge on top. Place it on top of the A unit fabric, lining up the right hand edges and bottom edges. Place the C unit fabric wrong side up on top of the other two pieces, again aligning the right hand side; stitch through all 4 layers on the right side with a ¼” seam allowance. Repeat until you have 18 blocks.
Press center seams open. Turn each block over and pull the open end of the C block down towards the bottom edge, flattening out the fabric on the bottom, and pressing the edges of the resulting geese block.
Press. If you want to stitch those left and right sides down for a flatter look, use a matching thread, and do that before you proceed.
Sew the individual blocks together in sets of six, with all of the geese pointed in the same direction. Each group of blocks will have an unfinished measurement of 12 ½” by 12 ½”. Lay the blocks out as you wish, and press again.
For the inner border, cut 3 strips 21/2 “ x WOF and Cut one strip in half. Attach the short ends of the half strip to the block set on the short sides. Press and trim. Repeat with the longer strips, and trim once again. For the outer borders, use 4 strips instead of 3. If you need to add length to the long borders, center the long piece on the side and add trimmings from the short sides.
Layer your runner with batting and backing, and quilt as desired. I quilted mine with ‘walking foot style’ straight lines. You will need approximately 130 inches of binding. Cut binding strips using your favorite method. You can also check my flange binding tutorial at: https://youtu.be/7jqrs7wLyso .
Thank you for your interest in One Quilting Circle, and please send me photos of your completed runners. If you have any questions about this pattern, please email me at Linda@thepatchworkpearl.com
Happy Quilting!
Linda Pearl
Nashua NH
July 2020
You can find other patterns and projects online at www.onequiltingcircle.com


